In the preceding article, Two-Factor Authentication with Yubico OTP, we demonstrated how quickly existing services can be extended with two-factor authentication (2FA) using Yubico OTP with the help of the PAM module pam_yubico. The validation service used, the YubiCloud, is provided by Yubico free of charge.
However, the fact that you are bound to an external service provider is not to everyone’s liking: data protection concerns or doubts about the reliability of the cloud service lead to the question of whether the required services could not also be operated on your own systems. There may also be scenarios in which you cannot access external services.
The good news is that there is also the option of hosting the services yourself!
Components

To be able to validate Yubico OTPs on your own system, two components are required: the YubiKey OTP Validation Server and the YubiKey Key Storage Module. Yubico provides the necessary software both in source code and as ready-made binary packages in various Linux distributions.
It should be noted that a large part of the documentation available online is still based on the old Key Storage Module, YK-KSM. The YK-KSM is implemented in PHP5 and is to be regarded as obsolete because it requires functions and libraries that are no longer included or available in current PHP versions.
Validation Server – VAL
The Validation Server implements the Yubico WSAPI for validating Yubico OTPs, which is also used in the YubiCloud. This is a PHP application that requires an RDBMS such as PostgreSQL® or MySQL in addition to the Apache web server to operate.
The PAM module pam_yubico discussed in the previous articles can be configured by specifying a URL so that it uses a different Validation Server, in our case a local one, instead of the YubiCloud.
If a client, for example the PAM module, sends a Yubico OTP to the validation service via the WSAP, the validation service forwards the OTP to the Key Storage Module and receives the decrypted OTP back from there. Based on the counter readings and timestamps, which are compared with the last values stored in the database, the VAL can then decide whether the OTP is valid or not.
Key Storage Module – KSM
The Key Storage Module is used for the secure storage of the shared secrets of the YubiKeys used. The key used for encryption is either stored on a hardware module costing a good €650, or – as in this case – inexpensively in a text file. In contrast to the VAL, the KSM does not require a relational database, but instead uses the file system, by default the folder /var/cache/yubikey-ksm, and stores the shared secrets there in encrypted form in so-called AEAD files.
The KSM used here is implemented in Python and runs as an independent service, which by default listens on port 8002 TCP for connections from localhost and offers a simple REST interface there.
The Validation Server can use this REST interface to send OTPs to be checked to the Key Storage Module, which then uses the Public ID to read the corresponding shared secret from its memory in order to decrypt the OTP and return its content to the VAL.
Installation
Fortunately, there are ready-made packages for both the validation server and the key storage module in most Linux distributions. The following describes the installation and configuration of the services under Debian GNU/Linux Buster.
Key Storage Module – KSM
The KSM can be easily installed in Debian with the package yhsm−yubikey−ksm installed:
# apt-get install yhsm−yubikey−ksm
Before configuring the newly installed service, the so-called keyfile, which contains the key used to encrypt the key storage, must be created:
# mkdir -p /etc/yubico/yhsm
# touch /etc/yubico/yhsm/keys.json
# chown yhsm−ksmsrv /etc/yubico/yhsm/keys.json
# chmod 400 /etc/yubico/yhsm/keys.json
The keyfile can now be opened with any editor and filled with a key. As the file extension suggests, the keyfile is a JSON file. In the following example, the key, which is located in “Slot” 1, is 000102030405060708090a0b0c0d0e0f101112131415161718191a1b1c1d1e1f.
{
  "1": "000102030405060708090a0b0c0d0e0f101112131415161718191a1b1c1d1e1f"
}
000102030405060708090a0b0c0d0e0f101112131415161718191a1b1c1d1e1f is the hexadecimal representation of a 32-byte (i.e. 256-bit) example key. For productive use, a reasonable key created from random data should of course be used. The program openssl can be used for this:
$ openssl rand -hex 32
To configure the KSM, only a few parameters need to be adjusted in the file /etc/default/yhsm−yubikey−ksm:
YHSM_KSM_ENABLE="true"
YHSM_KSM_DEVICE="/etc/yubico/yhsm/keys.json"
YHSM_KSM_KEYHANDLES="1"
The parameter YHSM_KSM_ENABLE="true" ensures that the KSM is started automatically when the system starts. Instead of the hardware device configured by default, the keyfile just created and the key with the ID 1 from it are used.
Finally, the KSM is restarted with the changed configuration using systemctl restart yhsm−yubikey−ksm.
Validation Server – VAL
As already mentioned, the Validation Server is a web application written in PHP, the operation of which requires a web server and an RDBMS. While the package dependencies prescribe an Apache web server, you have the choice between MySQL, MariaDB and PostgreSQL® for the databases. According to the dependency order of the package, MySQL would be installed by apt here, but to give PostgreSQL® preference, it must be explicitly listed:
# apt-get install yubikey−val postgresql php−pgsql
The configuration of the Validation Server in /etc/yubico/val/ is set by default to the Key Storage Module running locally on the same system, so no further intervention is necessary.
So that the PAM module can authenticate itself later when making requests to the Validation Server, credentials in the form of an ID and a key must still be created:
# ykval−gen−clients
2,cOyFHRvltNYDjx74JE9jOBcdPhI=
This step corresponds to the registration in the YubiCloud described in the previous article. The output of the command consists of two parts: the ID, followed by a comma and the key in Base64 encoding.
If the Validation Service is to be used from several machines, it is recommended to create separate credentials for each machine. To have several ID-key pairs created, ykval-gen-clients is simply called with the desired number:
# ykval−gen−clients 5
3,6WP1q1ohy92G/BNLMNjpHpVeL1Q=
4,InVj6Nbqc9FQN1EgtbsedtuYT9I=
5,p/R/hHx6E3Kf3Qc+671O46laNec=
6,/FRX6YqioHSap+zoM+LkWp88TFU=
7,XxEp4zoHSi9zTDSngvxnGiD4V1A=
To avoid losing track, you should note which credentials were used for which computer. Alternatively, ykval-gen-clients with the switch --notes allows you to create a note:
# ykval-gen-clients --notes=OpenVPN
8,rZKpqc5WcU4OB4Nv551+U3lj2tk=
The program ykval-export-clients outputs all credentials stored in the database, including notes, to the standard output:
# ykval-export-clients
1,1,1619686861,ua//VH5rvFoxrFHGhLZBz/RO3m0=,,,
…
8,1,1619687606,pkodRX1F77Ck7bvS9MzpXE5IfxA=,,OpenVPN,
Here you can see that credentials with ID 1 were already created during the installation of the package. Of course, instead of creating your own ID, you can also read this from the database and use it to set up the PAM module.
PAM
As the last change to the system, the PAM module pam_yubico must be installed and entered in the corresponding service configuration.
# apt-get install libpam−yubico
As in the previous articles, OpenVPN should once again benefit from 2FA with Yubico OTP. For this purpose, the file /etc/pam.d/openvpn is created or adapted:
auth sufficient pam_yubico.so id=2 key=cOyFHRvltNYDjx74JE9jOBcdPhI= urllist=http://localhost/wsapi/2.0/verify authfile=/etc/yubikey_mappings
account required pam_permit.so
The values specified in the above call of ykval-gen-clients or ykval-export-clients are used as values for id and key. The parameter urllist receives the URL of the WSAPI of the validation service, which in this case runs on the same computer.
As with the use of the YubiCloud, a authfile must be specified again this time – a file that contains the mappings of user names to Public IDs. This is created later, after the keys have been generated.
The configuration of the OpenVPN service is carried out as described in the article Two-Factor Authentication for OpenSSH and OpenVPN. On the server side, the supplied OpenVPN-PAM plugin must be loaded in the configuration:
plugin /usr/lib/openvpn/openvpn-plugin-auth-pam.so openvpn
On the client side, only the option auth-user-pass is added to the existing configuration, so that the user is asked for a user name and password (here: OTP) when establishing a connection.
Key Management
So that YubiKeys can be used with your own validation service, they must be programmed with a new key, the shared secret. These keys are created in the KSM, read out from it and then written to the YubiKey.
As the shared secret programmed on the YubiKey at the factory cannot be read out, it is of no use for a self-hosted validation service.
Generation in the KSM
To generate a series of keys in the Key Storage Module, the command yhsm-generate-keys is used:
# yhsm-generate-keys -D /etc/yubico/yhsm/keys.json --key-handle 1 --start-public-id credtivccccc -c 10
output dir : /var/cache/yubikey-ksm/aeads
keys to generate : 10
key handles : {1: '1'}
start public_id : 13412510728192 (0xc32d7f00000)
YHSM device : /etc/yubico/yhsm/keys.json

Generating 10 keys

Done
The above command creates 10 (-c) keys, starting with the ID credtivccccc (--start-public-id) and uses the key with the ID 1 (--key-handle), which is in the file /etc/yubico/yhsm/keys.json (-D) for encryption. The keys are stored as described above under /var/cache/yubikey-ksm/aeads.
The output gives a brief overview of the parameters used, the simple Done indicates the successful creation and storage of the credentials.
Caution: if the above command is called several times, existing keys with the same ID will be overwritten without prompting!
With the help of the command yhsm-decrypt-aead, the keys just created can now be read out from the KSM:
# yhsm-decrypt-aead --aes-key 000102030405060708090a0b0c0d0e0f101112131415161718191a1b1c1d1e1f --format yubikey-csv /var/cache/yubikey-ksm/aeads/
1,credtivccccf,47072c411963,1feff43b2d2b529c697d9db0849c9594,000000000000,,,,,
2,credtivccccc,512a73c09e98,d6e07a6def46cee722be21b7c2f35aec,000000000000,,,,,
3,credtivcccce,b491988426de,a72669341ab2a7d2acecec91c2fa0efb,000000000000,,,,,
4,credtivcccci,fccc5e1dcfcf,b0b14a2454c6d2a54bd2351f09d19d6e,000000000000,,,,,
5,credtivccccb,8a0b3916582f,a031f201920f6204a38b239836486bbf,000000000000,,,,,
6,credtivccccj,b9dd85895291,e04d79d45ff80438c744f2a8deec4a15,000000000000,,,,,
7,credtivccccg,a5213cab8e9c,f20acb5646de4282f21ef12b65c6a082,000000000000,,,,,
8,credtivcccch,73e9c1fa06b9,4c9d121e432a2fbd14b4a5d96f3b9d8f,000000000000,,,,,
9,credtivccccd,0695db026eb8,90779c79b363b7dbe54a9c3012e688e5,000000000000,,,,,
10,credtivcccck,ddd42451acb3,f5803057ea519149041be830509b7b2a,000000000000,,,,,
The AES key created during the setup of the KSM is specified here as --aes-key; the argument --format yubikey-csv ensures that the credentials are output as comma-separated values instead of in raw format. The last argument specifies the storage location of the AEAD in the file system.
Programming the YubiKey
A line in the above output of the command yhsm-decrypt-aead contains the credentials for a YubiKey in several comma-separated fields: in addition to the serial number (field 1), these are the Public ID (field 2), the Private ID (field 3) and the actual AES key (field 4). All other fields are not used in our case.
The entry in line 1 therefore contains the Public ID credtivccccf with the Private UID 47072c411963 and the AES key 1feff43b2d2b529c697d9db0849c9594.
These credentials can now be written to a YubiKey. The program ykpersonalize is a powerful command line tool for configuring YubiKeys and is located in the package yubikey-personalization on Debian.
If there is already a configuration in slot 1 (-1) of the Yubikey that should not be overwritten, you can instead write to slot 2 using -2. The call ykpersonalize -x swaps the contents of slot 1 and slot 2 of a YubiKey.
Unfortunately, the tool ykpersonalize uses different terms for the components of a credential: the Public ID becomes the fixed part and the Private UID becomes the uid. The following call writes the above credentials to slot 1 of a plugged-in YubiKey.
$ ykpersonalize -1 -o fixed=credtivccccf -o uid=47072c411963 -a 1feff43b2d2b529c697d9db0849c9594
Firmware version 5.1.2 Touch level 1287 Program sequence 3

Configuration data to be written to key configuration 1:

fixed: m:credtivccccf
uid: 47072c411963
key: h:1feff43b2d2b529c697d9db0849c9594
acc_code: h:000000000000
ticket_flags: APPEND_CR
config_flags:
extended_flags:

Commit? (y/n) [n]:
It should be noted that fixed part and uid are transferred as a KV pair using -o, while the AES key is transferred directly using -a.
If the query Commit? is answered in the affirmative, the displayed configuration is written to the Yubikey and from then on, when the button is pressed, it outputs a Yubico OTP created with the new credentials.
If you want to program several YubiKeys, the next of the generated credentials is simply used in further calls of ykpersonalize accordingly. All commands and tools used use files in CSV format or use stdin/stdout; recurring processes can therefore be excellently automated by a bash script or similar.
As an alternative to the approach described here, the YubiKey Personalization Tool from the package yubikey-personalization-gui offers the possibility to program several YubiKeys in a row. To do this, activate the option Program Multiple YubiKeys in the GUI under Yubico OTP → Advanced. In order to store the credentials of the YubiKeys programmed in this way in the KSM, the log file configuration_log_hmac.csv offered for saving after programming must first be adapted before the credentials contained therein can be imported into the KSM with the program yhsm-import-keys.
According to the man page, yhsm-import-keys expects a CSV file with the following structure:
# ykksm 1
seqno, public id, private uid, AES key,,,,
…
The log file of the YubiKey Personalization Tool already contains the fields public id, private uid, and AES key in the correct order as fields 4-6. The following awk script log2ksm.awk extracts these fields from the file, sets their line number as a sequence number in front of them, and outputs the entries line by line after the mandatory header # ykksm 1:
#!/usr/bin/awk -f

BEGIN {
  FS=","
  printf("# ykksm 1\n")
}

/^Yubico OTP/ {
  printf("%d,%s,%s,%s,,,,
", NR, $4, $5, $6)
}
The command to convert the file configuration_log_hmac.csv and save the result as yubikey_secrets.csv is:
$ ./log2ksm.awk configuration_log_hmac.csv > yubikey_secrets.csv
The generated file can then be copied to the machine where the KSM is running, and its entries can be imported into it with the following command:
# yhsm-import-keys -D /etc/yubico/yhsm/keys.json --key-handle 1  <  yubikey_secrets.csv
output dir : /var/cache/yubikey-ksm/aeads
key handles : {1: '1'}
YHSM device : /etc/yubico/yhsm/keys.json


Done
Here too, Done indicates that the credentials have been successfully imported.
PAM
So that PAM can map received Public IDs to user accounts during authentication, the above configured authfile under /etc/yubikey_mappings must still be created. This contains a username and its assigned YubiKey IDs per line, separated by colons. If the newly created YubiKey with the Public ID credtivccccf is to be used by user bob, the authfile must contain the following line:
bob:credtivccccf
Mappings for further user accounts are configured accordingly in separate lines.
As an alternative to using a authfile, the mappings can also be made using an LDAP directory service. A separate article will be dedicated to this variant.
Demo
If all steps have been carried out successfully up to this point, the OpenVPN client will ask for a username and password or the OTP when establishing a connection. While the username still has to be entered manually, a press of a button on the YubiKey is sufficient to enter the OTP, so that the connection can be established. Instead of the individual characters of the OTP, only asterisks are displayed here as well.
# openvpn client.conf
...
Enter Auth Username: bob
Enter Auth Password: ********************************************
...
Conclusion
The installation and operation of your own validation service and Key Storage Module is quite complex and involves some effort. The interaction of the components with each other is difficult to track (which makes troubleshooting difficult), and the available tools are sometimes not very intuitive or even inconsistent (which makes understanding difficult).
However, those who do not shy away from the effort and are willing to delve deeper into the subject can ultimately enjoy the full comfort of Yubico OTP while still maintaining control over all components.
Support
If you require support with the configuration or use of two-factor authentication, our Open Source Support Center is at your disposal – if desired, also 24 hours a day, 365 days a year.
The article Two-factor authentication for OpenSSH and OpenVPN presented a simple way to increase the security of PAM-enabled services through two-factor authentication. The TOTP method used generates a one-time password that is valid for a limited period of time based on a shared secret.
Depending on the method and encoding, the shared secret consists of 32 or even 40 characters that must be communicated to the user. QR codes have become established as a convenient and fault-tolerant solution for this, which can be read with suitable apps. However, these QR codes often contain additional, superfluous information that allows conclusions to be drawn about the account.
This article takes a look at the structure of the content of such QR codes and how they can still be used securely.
Pitfalls
In his article Why you shouldn’t scan two-factor authentication QR codes, Sam Aiken constructs interesting scenarios and advises against the thoughtless use of QR codes for transmitting the shared secret in 2FA.
In addition to the shared secret, most QR codes also contain information about the service provider, the service itself, and usernames. If an attacker obtains this information – be it through the QR code itself or because the app used stores its data unsecured locally or in the cloud, or loses it otherwise – he only needs to obtain the account password to use the service under a false name.
The user is, of course, free to delete or modify this additional information, but according to Aiken, this is not possible in all apps: some apps did not allow changes, while others offered the possibility to make changes but remembered the originally read values, so that unnecessary information could be disclosed here as well. Aiken also criticizes that many services only displayed QR codes, but not the shared secret as a string, which would give the user full control over the data entered into an app.
In addition to using a recommended app in this regard, such as andOTP, whose use admins can influence but not always prescribe, it would therefore be desirable if QR codes contained only the essential information from the outset anyway.
URI Scheme
The content of such a QR code ultimately corresponds to a URI, such as the one Google uses for its Authenticator app at Github:
otpauth://TYPE/LABEL?PARAMETERS
The placeholder TYPE indicates whether the method used is HOTP or, as in our case, TOTP; LABEL, according to the specification, should contain information about the issuer and user account; PARAMETERS can contain additional information besides the required secret.
| Parameter | Description | Default |
|---|---|---|
| secret | Shared Secret in Base32 encoding | – |
| counter | Counter value for HOTP | – |
| issuer | Issuer | – |
| algorithm | Used Hash Algorithm | SHA1 |
| digits | Length of the generated OTP | 6 |
| period | Validity period for TOTP | 30 |
Of all the options listed, according to the specification for TOTP, only TYPE, LABEL, and the PARAMETER secret are required.
With this information, we can now create a URI for the shared secret generated for user Alice in the last article. For data economy, only the service is specified here in the label. Should Alice require further information about the service, it can be communicated to her through other means.
otpauth://totp/OpenVPN?secret=4LRW4HZQCC52QP7NIEMCIT4FXYOLWI75
The information contained in this URI does not allow any conclusions to be drawn about the operator, the address, or the username used for the specified service. This should be sufficiently secure for most use cases.
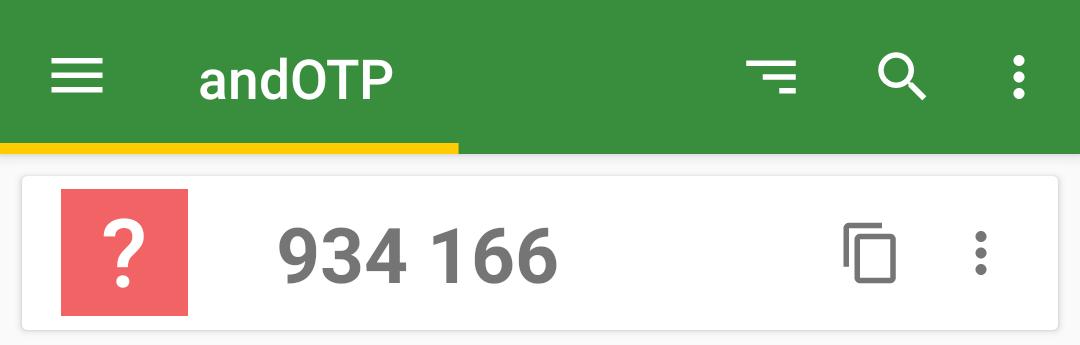
Furthermore, tests with andOTP showed that the LABEL section of a URI can also be left completely empty and still be read without problems:
otpauth://totp/?secret=4LRW4HZQCC52QP7NIEMCIT4FXYOLWI75
Generate QR Code
To convert the URI you just created into a QR code, you can use the command line tool qrencode. The codes can be written to an image file or displayed directly as ASCII art on the command line:
$ qrencode -t ANSI 'otpauth://totp/OpenVPN?secret=4LRW4HZQCC52QP7NIEMCIT4FXYOLWI75'
Strictly speaking, -t ANSI ANSI art is generated here by the argument, because so-called border characters are used in the output, which do not appear in the original ASCII character set. Although an output in true ASCII art can be generated using -t ASCII, the graphic consists only of # and spaces, which is much harder to recognize and thus unnecessarily complicates reading with a smartphone.
If an image file is to be generated instead, the output format is set to PNG with -t PNG and the name of the output file is specified using -o qr-alice.png:
$ qrencode -t PNG -o qr-alice.png -s 10 'otpauth://totp/OpenVPN?secret=4LRW4HZQCC52QP7NIEMCIT4FXYOLWI75'
The argument -s 10 is optional here and serves only to increase the size of a dot in the output file from three to ten pixels:

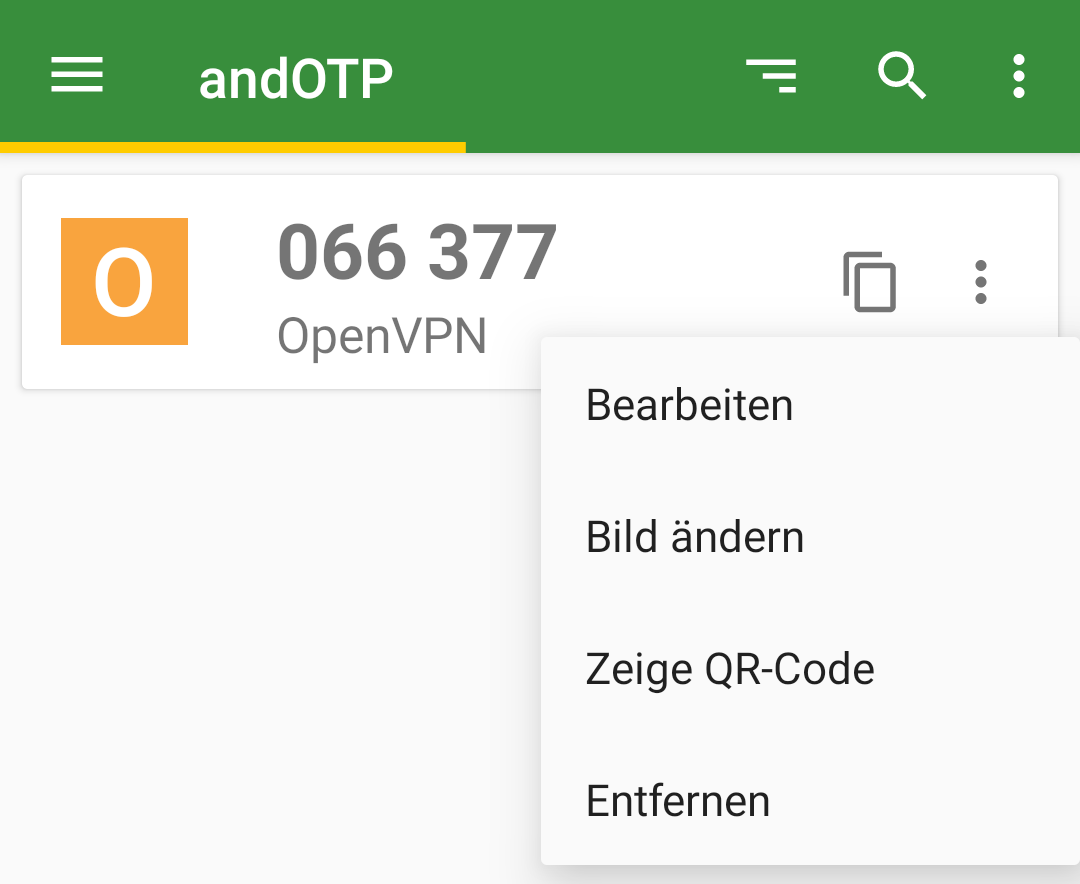
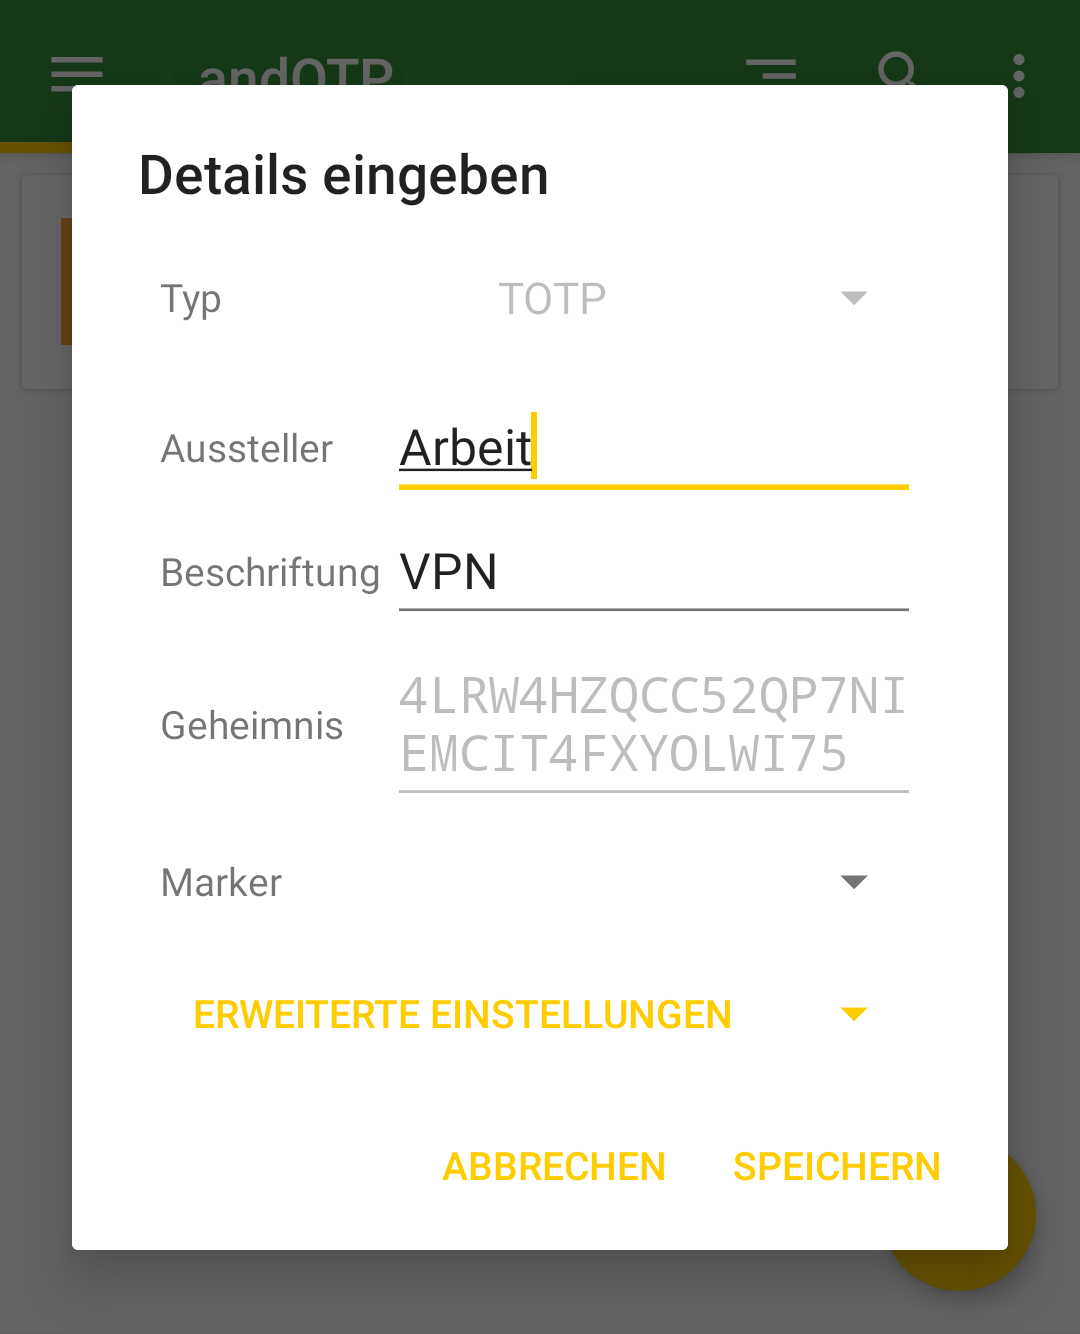
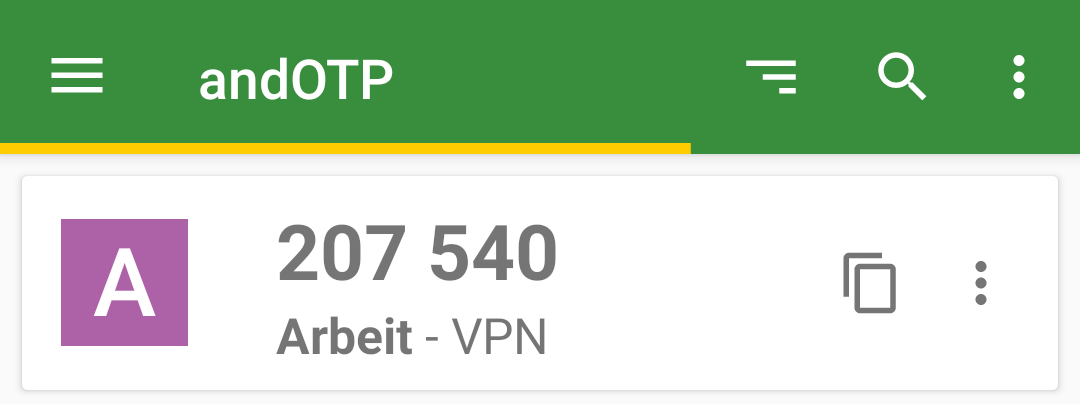
Edit Entry
Should Alice want to record further information about her OTP, she can now enter this herself manually in her app or record it otherwise. Here too, data economy does not have to be sacrificed: for example, to distinguish between two VPN entries, it is sufficient to assign them different Issuers, such as Work and Club. In the case of andOTP, this also changes the icon, which now uses the first letter of the issuer.
Conclusion
QR codes are still best suited for transmitting shared secrets to end-users. However, before blindly copying the practices of others, it is worthwhile to look behind the scenes of the standards used and to consider what information really needs to be transmitted and to practice data economy when creating your own QR codes.
By using a flexible command-line tool like qrencode, the creation of custom QR codes could even be automated quite easily for a larger number of users.
Support
If you require support with the configuration or use of two-factor authentication, our Open Source Support Center is at your disposal – if desired, also 24 hours a day, 365 days a year.
Authentication using username and password still represents the standard procedure for most applications to authenticate to a service. However, the use of a second factor is becoming increasingly widespread and is even recommended by the BSI, the German Federal Office for Information Security. While not mandatory, various web services at least offer the option to enable two-factor authentication (2FA) for a user account.
However, not only the security of web services can be enhanced using 2FA—classic services such as SSH also allow the use of a second factor alongside the usual authentication methods such as passwords or certificates.
Methods
The most widely used method for one-time passwords as a second factor is probably TOTP, the Time-Based One-Time Password. The method is standardized in RFC6238 and is sometimes also known as Google Authenticator.
With TOTP, a numeric one-time password (OTP) valid for a short period is calculated from the current time and the shared secret, a secret known to both the service and the user.
Typically—and fixed in the case of Google Authenticator—the password consists of 6 digits and has a validity period of 30 seconds. However, the standard also provides for other lengths and time periods.
For calculating the OTP, there are CLI applications such as oathtool as well as GUI applications such as KeePassXC or smartphone apps such as AndOTP.
Setup
PAM (Pluggable Authentication Modules) is a collection of libraries that allows applications and services to delegate user authentication instead of having to implement it themselves. For this purpose, the messages exchanged during authentication between PAM and the user are forwarded through the application to the respective recipient.
During this conversation, PAM processes the modules configured in the application’s service file, in which the respective authentication methods are implemented. PAM ultimately reports only success or failure of the authentication to the application itself.
To use one-time passwords under Linux, the PAM module pam_oath is recommended. All services that use PAM to authenticate their users can thus be easily extended with two-factor authentication functionality. These include not only system internals such as login, su, or sudo, but also network-accessible services such as SSH or OpenVPN.
Depending on the distribution used, the PAM module is located in the package libpam-oath (Debian etc.) or pam_oath (CentOS etc.) and can be installed from the official sources.
PAM
To set up TOTP for SSH, the corresponding PAM service file must be modified. This is located at /etc/pam.d/sshd.
This file is approximately 50 lines long and describes, among other things, how a user’s identity can be verified when logging in via SSH and what environment is created before calling their login shell.
The exact function of the individual entries would exceed the scope of this article. The only line of interest for setting up TOTP is
@include common-auth
This adopts the default system behavior defined in the service file /etc/pam.d/common-auth: using the module pam_unix, the user’s password is compared with that in /etc/shadow.
To require verification of an OTP using pam_oath, the following line is added directly below the above @include directive:
auth required pam_oath.so usersfile=/etc/users.oath digits=6 window=2
The parameter usersfile refers to a file in which the users’ shared secrets are stored, digits=6 sets the length of the OTP to 6 digits.
Using window=2 enlarges the window of allowed OTPs. With a window size of 2, in addition to the currently valid OTP, the passwords from the previous and next time period are also valid. While a window size of 0 only allows the current OTP, an increasing number allows one more future and one more past password respectively. Additional parameters can be found in the module’s documentation.
The structure of the usersfile follows the *NIX tradition: each line represents an entry containing multiple fields separated by one or more spaces. While an entry can contain up to nine fields, only the first four are relevant when setting up a new user. They contain, in order: the method used, the username, an optional PIN, and in the last field the shared secret.
The RFC recommends a 160-bit (i.e., 20-byte) random number as the shared secret. This can easily be created using the openssl program:
$ openssl rand -hex 20
The output is the 40-character Base16-encoded representation of the randomly generated string, for example e2e36e1f3010bba83fed4118244f85be1cbb23fd.
To append an entry for the user alice using the TOTP method with a validity period of 30 seconds to the usersfile, the following command line can be used. The call to openssl contained in $() is replaced by its output, the 20-byte shared secret.
$ echo "HOTP/T30 alice - $(openssl rand -hex 20)" | tee -a /etc/users.oath
The program tee outputs the generated entry including the shared secret on the command line and also appends it as an additional line to the usersfile /etc/users.oath:
$ echo "HOTP/T30 alice - $(openssl rand -hex 20)" | tee -a /etc/users.oath
HOTP/T30 alice - e2e36e1f3010bba83fed4118244f85be1cbb23fd
SSH
An OpenSSH configured with default settings authenticates users using the built-in PasswordAuthentication. To use PAM, this must be disabled and ChallengeResponseAuthentication enabled instead. Authentication via PAM is then activated using the parameter UsePAM.
The configuration file /etc/ssh/sshd_config must therefore contain the following lines:
PasswordAuthentication no
ChallengeResponseAuthentication yes
UsePAM yes
Demo
Due to the changes to the OpenSSH configuration, the prompt that requests password entry during connection establishment has changed.
The PasswordAuthentication built into OpenSSH displayed the username and hostname used for the connection in the prompt.
alice@local$ ssh alice@192.0.2.1
alice@192.0.2.1's password:
alice@remote$
After switching to PAM using ChallengeResponseAuthentication, the input prompt of the respective PAM module is displayed: first pam_unix, then pam_oath.
alice@local$ ssh alice@192.0.2.1
Password:
One-time password (OATH) for `alice':
alice@remote$
OpenVPN
OpenVPN classically authenticates users via certificates validated by a trusted, often local, CA. However, during the connection establishment process, it is also possible to query a username and associated password on the client side and verify them on the server side.
To add 2FA to an existing OpenVPN installation, only a few changes to the configuration files are required.
To enable OpenVPN to delegate authentication of the username and password to PAM, the PAM plugin included in the standard installation is entered in the server’s OpenVPN configuration:
plugin /usr/lib/openvpn/openvpn-plugin-auth-pam.so openvpn
The parameter openvpn corresponds to the name of the PAM service file in /etc/pam.d/, which must be newly created:
auth required pam_oath.so usersfile=/etc/users.oath digits=6 window=2
@include common-account
If there are no user accounts on the machine running the OpenVPN service, their existence check can be skipped with a modified service file:
auth required pam_oath.so usersfile=/etc/users.oath digits=6 window=2
account required pam_permit.so
The module pam_permit always returns success. Since it is the only specified module of type auth, only its result is evaluated.
On the client side, only the following line needs to be added to the configuration so that the user is prompted for their username and (one-time) password during connection establishment:
auth-user-pass
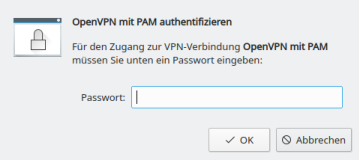
If the connection is configured on the client side via a GUI such as NetworkManager, under Connection type, instead of the usual setting Certificates (TLS), the entry Password with certificates (TLS) must be selected. Under Username, the username to be used is entered, but the Password field remains empty; the option Ask for this password every time must be selected there.
Demo
After adjusting the configuration on the client, the user is prompted to enter a username and the associated OTP during the TLS negotiation of the connection establishment, immediately after certificate verification.
# openvpn client.conf
...
Enter Auth Username: alice
Enter Auth Password: ******
...
Even when using NetworkManager, the user is prompted for the current one-time password during connection establishment.
Calculate OTP
The shared secret, or shared secret, must—as the name suggests—be known to both sides. On the server side, it is located in the usersfile; on the client side, there are various ways for the user to store the shared secret in order to calculate an OTP.
The shared secret required for calculation was generated with the openssl call listed above and output in hexadecimal representation or Base16-encoded. In addition to Base16, representation in Base32 is also common, so care must be taken as to which encoding a program expects when entering the shared secret. Both mentioned methods are described and standardized in RFC 4648.
While the tools base32 and base64 for Base32 and Base64 respectively are already included in the package coreutils, another tool must be installed for converting from Base16, for example basez. In addition to the main application basez, several symbolic links to it are also created, including base16, which can be used like base32 and base64.
To convert the shared secret generated above for alice from Base16 to Base32, the following call is sufficient. The option -d when calling base16 stands for decode, since the conversion is from Base16.
$ echo e2e36e1f3010bba83fed4118244f85be1cbb23fd | base16 -d | base32
4LRW4HZQCC52QP7NIEMCIT4FXYOLWI75
In Base32 encoding, the shared secret is 4LRW4HZQCC52QP7NIEMCIT4FXYOLWI75.
As expected, there are also numerous web-based tools online for converting between the various encodings. However, transmission to websites is not recommended: even a shared secret is a secret and should not be disclosed to third parties!
The situation is similar when using QR codes, which will be covered in a separate article. Although widely used, their use is not without risks that should be analyzed and minimized beforehand.
CLI
The program oathtool enables the calculation of OTP on the command line. To calculate TOTP, it is passed the argument --totp and the shared secret in Base16 encoding when called:
$ oathtool --totp e2e36e1f3010bba83fed4118244f85be1cbb23fd
oathtool assumes an OTP length of 6 digits and a window of 0. These assumptions can be adjusted with the arguments -d (Digits) and -w (Window).
If the shared secret is Base32-encoded, the argument -b must be prepended:
$ oathtool --totp -b 4LRW4HZQCC52QP7NIEMCIT4FXYOLWI75
GUI
In addition to securely storing static passwords, KeepassXC also offers the ability to generate one-time passwords according to TOTP. For this purpose, the shared secret is stored as an attribute of an entry.
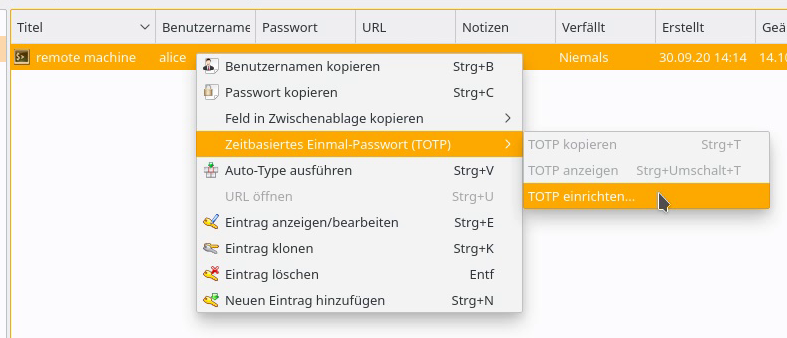
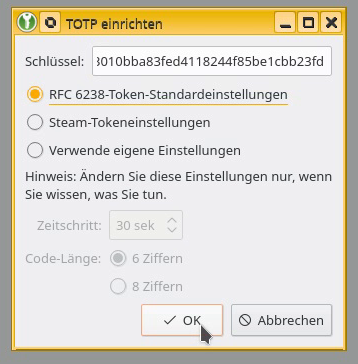
The shared secret can be added to an existing entry as a key by right-clicking and selecting Time-based One-Time Password (TOTP) > Set up TOTP…. RFC 6238 token standard settings assumes a length of 6 digits and a validity of 30 seconds. The Base16-encoded shared secret is expected as the key.
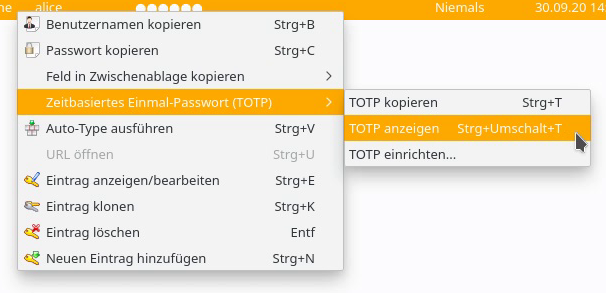
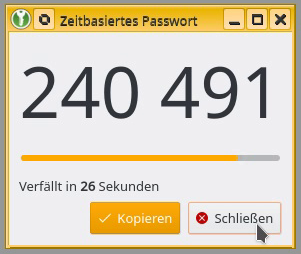
By right-clicking on the entry, the current one-time password can be displayed via Time-based One-Time Password (TOTP) > Show TOTP, or copied to the clipboard via Copy TOTP.
Smartphone App
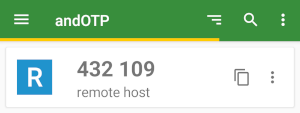
To calculate a TOTP on a smartphone, andOTP is recommended. The app is free software, licensed under the MIT License, and can be easily installed via F-Droid or from the Google Play Store.
A new entry can be created via the plus button in the lower right corner of the screen. In addition to the option to scan a QR code, the shared secret can be entered manually via the menu item Enter details, along with some settings such as time period, length, or hash algorithm.
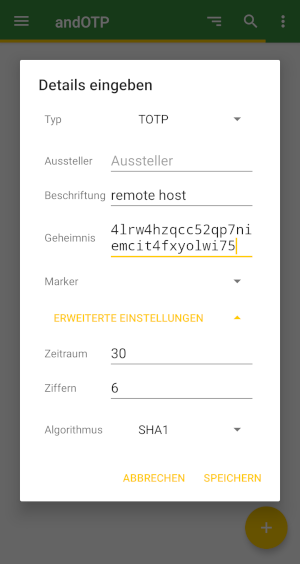
The possibility of reading the shared secret and settings for calculating a TOTP using a QR code will be covered in an upcoming article.
Conclusion
The examples presented demonstrate how easy it is to extend even existing services with two-factor authentication using TOTP. It is only necessary to configure the connection to PAM and the use of the pam_oath module in the corresponding service file.
The procedure shown is primarily suitable for individual systems with a few user accounts to be secured. More complex installations and other methods for one-time passwords are also possible.
Support
If you require support with the configuration or use of two-factor authentication, our Open Source Support Center is at your disposal – if desired, also 24 hours a day, 365 days a year.